Windows 11 Settings You Should Check After Installation
Getting your computer ready for daily tasks involves more than just finishing the initial setup wizard. Reviewing the various Windows 11 settings you should check after installation helps you tailor the environment to your specific workflow while improving privacy and performance. By taking a few moments to adjust these configurations, you ensure that your operating system works for you rather than against you.
This process creates a more stable, secure, and responsive user experience right from the first day of use. Let’s look at the critical areas that deserve your immediate attention to get the most out of your new software environment.
Optimizing the Taskbar and Start Menu
The taskbar is the primary anchor for your workflow in the new interface. By default, Microsoft centers the taskbar icons, which provides a clean look but might not be the most efficient for your muscle memory.
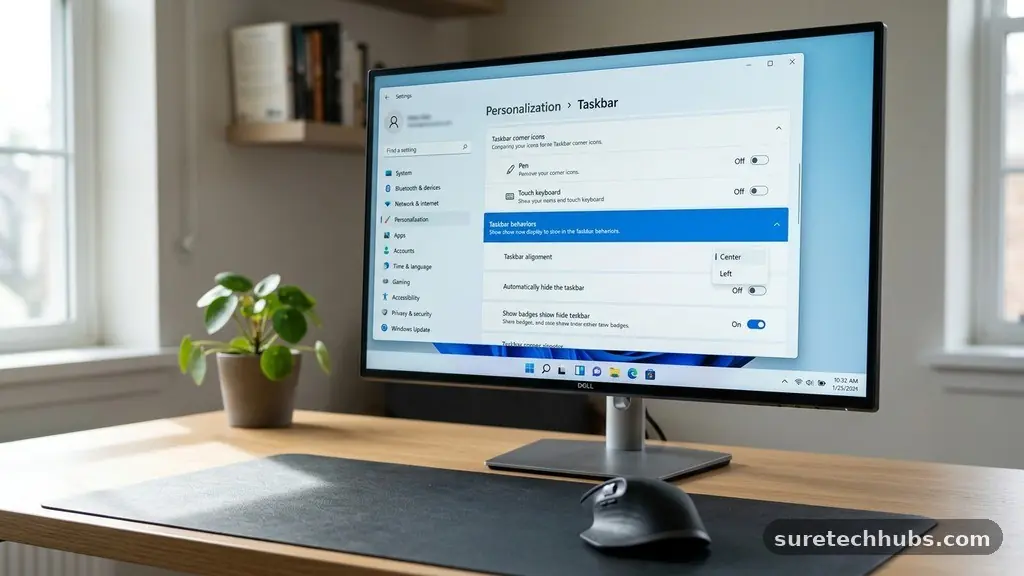
If you prefer the classic left-aligned layout, you can quickly change this by right-clicking the taskbar and selecting Taskbar settings. Navigate to Taskbar behaviors to shift the alignment back to the left side, which many users find more intuitive for rapid navigation.
You should also curate the pinned apps that occupy your taskbar and start menu space. Windows often comes with pre-installed shortcuts for services you might never use, such as specific chat apps or shopping tools.
Right-click these unwanted icons and select “Unpin from taskbar” or “Uninstall” to clear the clutter. This simple cleanup makes it easier to locate the programs you actually rely on during your workday.
Finally, consider the overflow menu settings if you tend to keep many windows open simultaneously. Windows 11 includes a feature that automatically hides icons when the taskbar becomes crowded.
Check the Taskbar corner overflow menu to ensure that essential system tray icons, like volume controls or cloud sync tools, remain visible. Keeping these accessible saves you from having to click the small arrow icon every time you need to check a status update.
Managing Privacy and Telemetry Data
Privacy is a significant concern for many users setting up a new machine. Microsoft collects various forms of diagnostic data to improve its services, but you have the power to limit this information flow.
Navigate to the Privacy & security section in your system settings to inspect what data is being shared. You can toggle off diagnostic data feedback and limit how much activity history is stored locally or in the cloud.
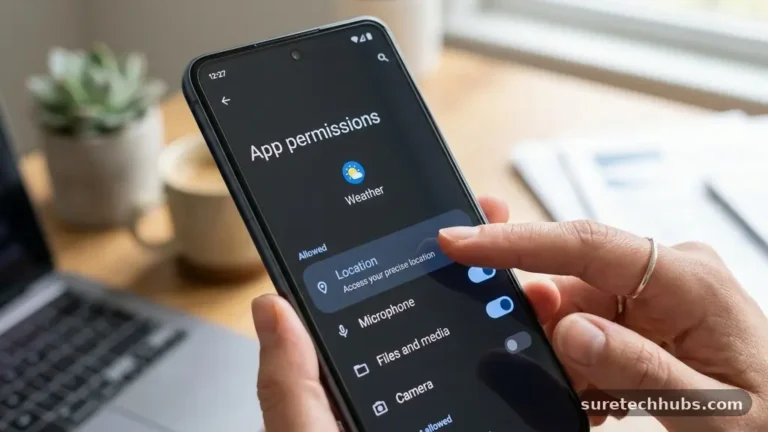
Pay close attention to app permissions, which control how software interacts with your hardware. Navigate to the App permissions list to see which programs have access to your camera, microphone, and location.
It is a good practice to turn off access for applications that do not strictly require these sensors to function. This step provides an extra layer of security and ensures you are not inadvertently sharing sensitive information.
Consider also the “General” tab within Privacy & security to disable advertising IDs. This prevents apps from using a unique identifier to serve you personalized ads based on your usage patterns.
While this doesn’t stop ads entirely, it reduces the amount of tracking that occurs across your different software environments. Being proactive with these permissions creates a more private computing experience that respects your personal boundaries.
Configuring Default Applications
Windows often defaults to its own suite of programs for common tasks like browsing the web or opening PDF files. Many users prefer third-party alternatives that offer specific features or better integration with their existing workflows.
To change these, go to Settings, then Apps, and look for the Default apps section. You can search for specific file types or protocols to see which program is currently assigned to handle them.
Updating these defaults is particularly important for your web browser. If you prefer a browser other than Microsoft Edge, you will need to manually set it as your default.
The system might prompt you to confirm this change across several file formats like HTML, HTM, and PDF. Making these adjustments early ensures that your computer behaves exactly as you expect when you click a link or open a document.
Keeping your default app list tidy also helps maintain system performance. If you have installed multiple image viewers or text editors, ensure the one you use most frequently is the primary choice.
You can review the list of installed apps regularly to see if any old programs are still claiming file associations they shouldn’t. This organization prevents your system from launching an unexpected program when you are in a rush.
Refining System Notifications
Notifications can quickly become a distraction if they are not managed effectively. Windows 11 allows you to customize which apps are allowed to send alerts and how those alerts appear on your screen.
Head over to the System menu and select Notifications to see a comprehensive list of every app that is currently permitted to interrupt you. You can turn off alerts entirely for non-essential apps or keep them on for critical communication tools.
Focus Assist, now often referred to as “Do Not Disturb,” is a powerful feature for maintaining concentration. You can configure this to activate automatically during specific times of the day or when you are working on a presentation.
This prevents banners and sound alerts from popping up while you are in the middle of an important task. Customizing the priority list ensures that only messages from your most important contacts or apps can break through the silence.
It is also worth reviewing the notification sound settings. Sometimes the default alert tone can be jarring or simply too loud for your office environment.
You can adjust the volume or switch to a more subtle sound that doesn’t demand your immediate attention for minor system events. Taking control of your notifications allows you to reclaim your focus and manage your digital environment with more intention.
Adjusting Display and Power Settings
Your display settings have a massive impact on your comfort and long-term eye health. After installing the OS, verify that your resolution and scaling are set to the recommended values for your specific monitor.
You can find these in the System menu under Display. If you find text too small to read, increasing the scale percentage by 10 or 25 percent can make a significant difference in your daily comfort.
Power management is another area where you should check the defaults, especially on laptops. You might want to adjust when the screen turns off or when the device enters sleep mode to balance battery life with convenience.
If you are using a desktop, you might prefer a high-performance profile to ensure the system is always ready for demanding tasks. These settings are found under System and then Power & battery.
Night light is a feature you should enable if you often use your computer in the evening. This setting reduces the amount of blue light emitted by your screen, which can help reduce eye strain and potentially improve your sleep quality.
You can schedule it to turn on automatically at sunset or during your preferred hours. Ensuring these display and power configurations are correct provides a much more pleasant experience during long sessions.
Enabling Important System Features
Some of the most useful tools in the operating system are not turned on by default. One such feature is the Windows Sandbox, which provides a lightweight, isolated environment to run untrusted software safely.
You can enable this by searching for “Turn Windows features on or off” in the start menu. This is a must-have for anyone who occasionally downloads files from unknown sources and wants to test them without risking their main system.
Another setting to check is the storage sense feature, which helps manage disk space automatically. When enabled, it can delete temporary files and clear out your recycle bin on a schedule you define.
This helps prevent your hard drive from filling up with unnecessary junk over time. You can find this in the System settings under Storage, where you can also view a breakdown of what is taking up the most space on your machine.
Finally, ensure that your update settings are configured to suit your schedule. You can set active hours to prevent your computer from restarting for updates while you are in the middle of a project.
Keeping your system updated is crucial for security, but it shouldn’t come at the cost of your productivity. You can find these options in the Windows Update section of your settings menu.
Comparing Common Configuration Needs
Different users have different priorities when setting up a fresh machine. The table below outlines some common settings that users frequently adjust based on their specific goals.
| Setting Category | Common Adjustment | Benefit |
|---|---|---|
| Taskbar | Left-align icons | Improves navigation speed |
| Notifications | Enable Do Not Disturb | Reduces daily distractions |
| Privacy | Disable advertising ID | Increases data security |
| Storage | Turn on Storage Sense | Automates disk cleanup |
| Display | Set Night Light | Reduces eye strain |
Each of these adjustments serves a specific purpose in creating a more efficient workspace. You don’t need to change everything at once, but being aware of these options allows you to make incremental improvements. For more detailed information on security practices, you can refer to the Cybersecurity and Infrastructure Security Agency advice on securing your devices to keep your system safe.
Frequently Asked Questions
Is it necessary to turn off all telemetry settings for privacy?
While you don’t need to disable everything, limiting diagnostic data to the “Required” level is a good middle ground. This prevents the sharing of non-essential usage data while still allowing the system to send necessary error reports that help improve stability.
What should I do if a feature I need isn’t appearing?
Check the “Optional features” list in the Apps settings. Sometimes useful tools like legacy media players or specialized developer environments need to be explicitly installed through this menu before they will appear in your system.
How often should I review my privacy settings?
It is a good habit to check your privacy and app permissions once every few months, especially after installing new software. Some programs may request broad permissions during their own setup process that you might want to revoke later.
Will changing default apps affect system performance?
Generally, no, but it is best to use lightweight, well-optimized software for your defaults. Bloated applications can sometimes slow down the time it takes to open specific file types, so stick to programs that are known for efficiency.
Can I revert my changes if I don’t like them?
Yes, almost every setting can be easily toggled back to its original state. If you aren’t sure about a change, just note what the original setting was before you modify it, so you can return to it if needed.
Reviewing the various Windows 11 settings you should check after installation is a vital step in personalizing your digital workspace. By taking the time to adjust taskbar behavior, privacy controls, and notification preferences, you create a system that truly reflects your needs. These small tweaks often lead to a significant boost in both comfort and productivity over the long term.
Start by addressing the settings that impact your daily workflow the most and build from there. Enjoy the process of shaping your new environment into a tool that supports your goals, and feel free to revisit these menus whenever your computing habits evolve.